As the Connecting Rod Turns, episode 2 . . . . . . .
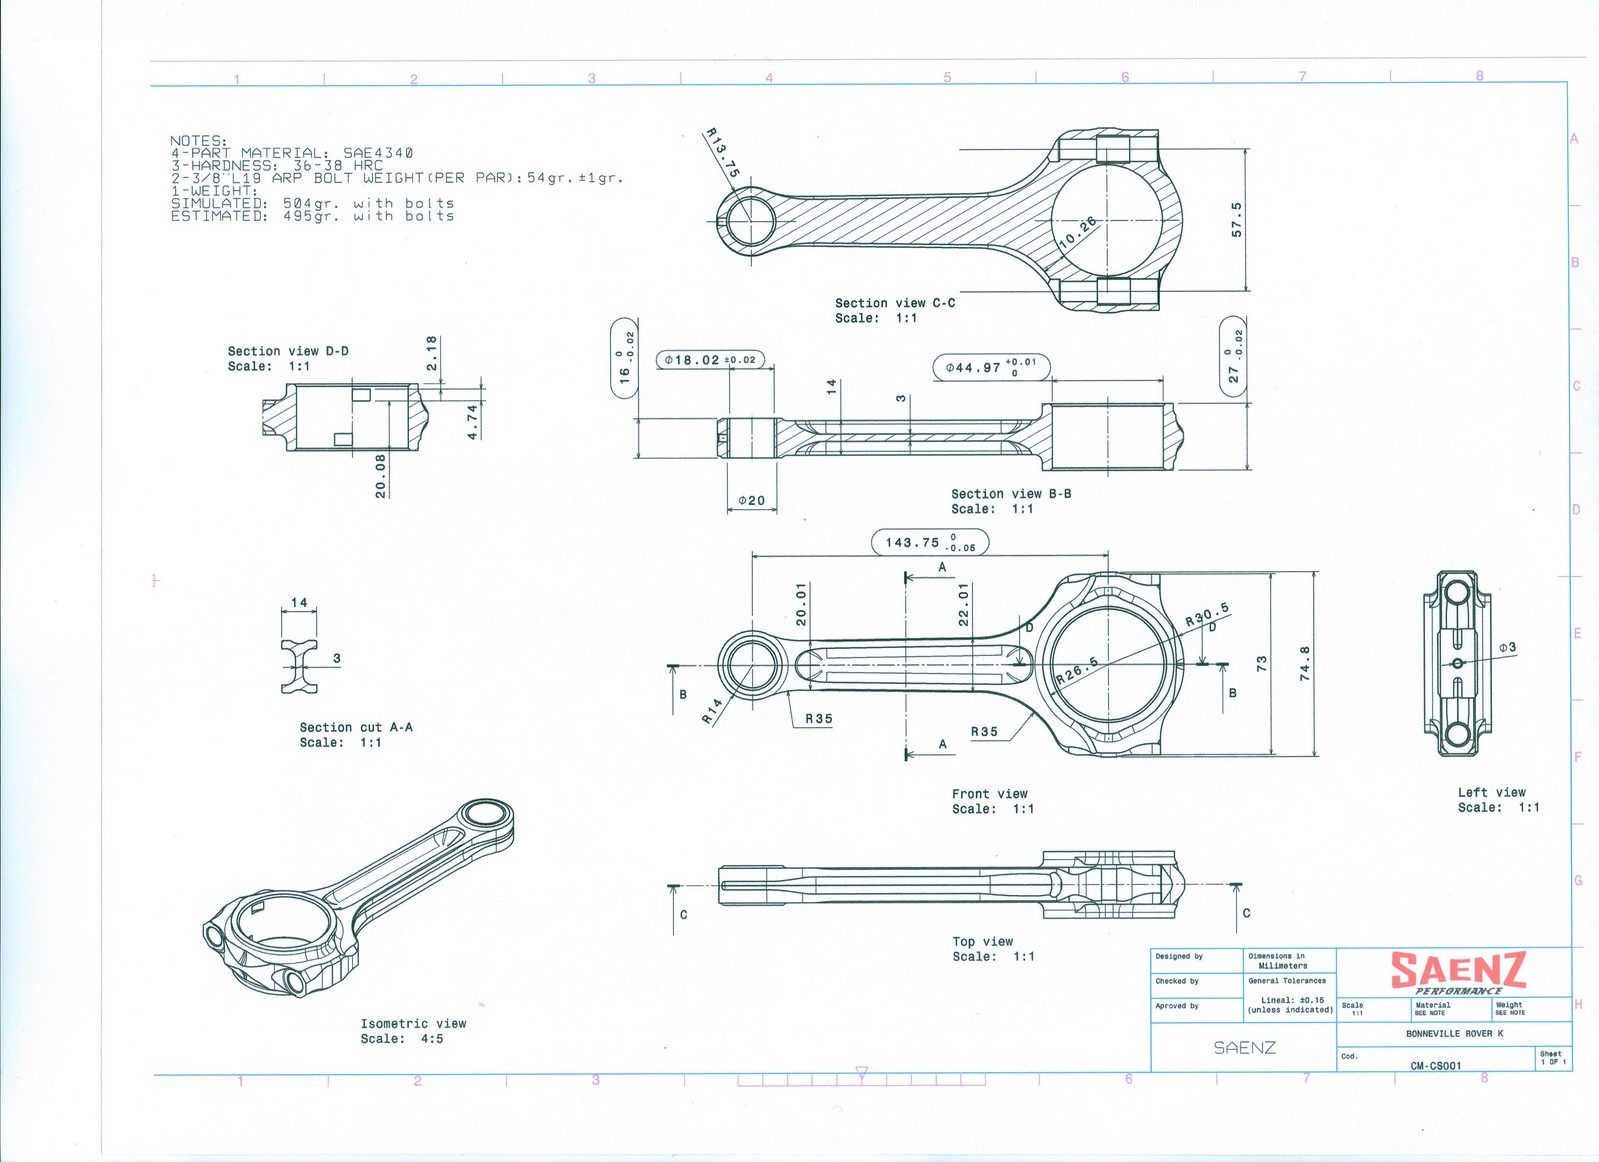
The 3mm hole shown in the left view is, in fact, the oil hole at the top of the rod. The two small curves at the bottom of the rod cap in the front view are apparently just an indication of a curved surface there. The alleged centering hole appears nowhere else in the drawing. If the 74.8 mm dimension is indeed intended to indicate a cylindrical feature, it is not properly so presented. Also, that area in the isometric view is shown as a flat along the split line.
Saenz may know what they’re doing, but that is not what the print says.
Shows 74.8 across the flats big end, into a 75mm bore!!?? Like IO says.
After haranguing others about "properly" interpreting graphical information, I am also guilty of the same crime . . . . . . .Mea culpa, mea culpa, mea maxima culpa . . . . . I've scanned and posted the print, as a jpeg photo above. And, as IO, jacksoni, and others have pointed out, the "print" does not depict what is required.
My error in quickly reviewing the drawing, (problematic in itself), was "assuming" the print's views were conventionally placed. Even though it is clearly labeled "left view", and should be on the left, it has been placed on the right hand side of the top, front, and section views, which are properly centered and aligned. As such, there is no "center hole" for turning the big end to 74.8mm radial diameter. And even if this process is intended, it is NOT called out on the drawing, as others have noted. The hole shown, is actually the pin end oiling hole, as IO correctly points out. I should have been more thorough in my inspection of the drawing, for instance, cross checking the isometric view, as IO did.
Now it might be convention and common practice to radially machine the big ends of con rods intended for small bore sizes, say less than 3-1/4" diameter bore size. But since it not on the drawing, it is unclear as to whether this will be done. And, there are other issues, bolt dimensions, locating sleeve dimensions, etc, pointed out by others.
It would be prudent for all of the issues to be cleared up, before approval of the "print". And there is good reason to do so.
The convention in industry is that if a client approves or supplies a print, then the following conditions apply:
A/ If the part does not match the print, then the manufacturer is responsible.
2/ If the part matches the print, but doesn't work, the client is responsible.
If nothing else, being particular about the print, shows the manufacturer that the client is serious about the manufacturing and fitting process.
Again, JMHO . . . . .


Shouldhavetakenmytimeboy